vendredi 29 octobre 2010

Crocheted potholder: how to work a hanger without sewing

Well, as you all know, I hate taking my sewing needle and sew by hand,
(I have a nice sewing machine to do this Clignement d'œil)
so everytime I try to work without sewing !
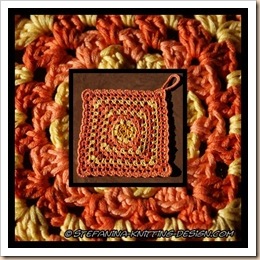
As you, I have to hang my potholder and I have found a way to create one hanger when I was working on the border of my third granny carré soleil.
For this one, I have used the same yarn, but worked it with 4 colors to finish my left-over from the Grandala pochette.

carré soleil 3 montage
Sorry I don’t have had the time to block it before taking some pictures, as I need it urgently in my kitchen Ange

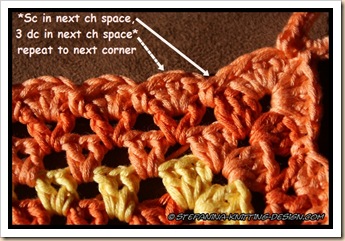
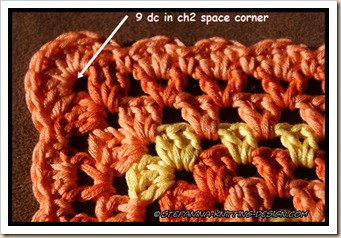
When I was finishing it I took some pictures to show you how I have worked the border:

Carré soleil 3 - begin border
Carré soleil 3 - begin border (2)
Carré soleil 3 - corner
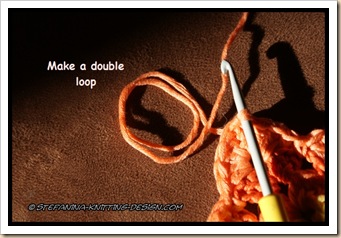
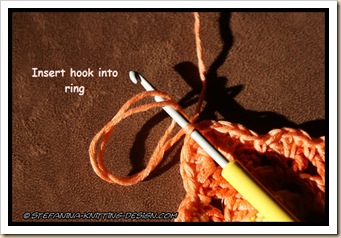
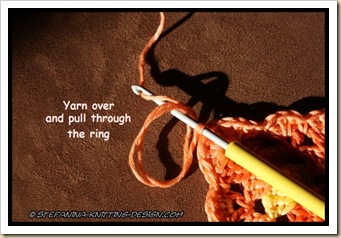
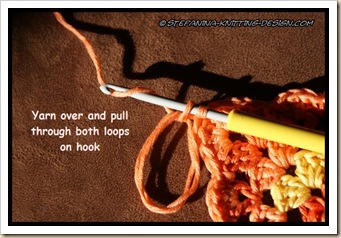
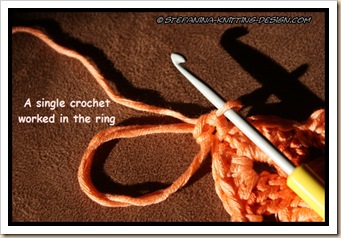
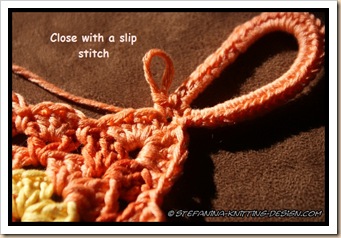
Continue working as shown until the last corner, finish with dc4 and a slip stitch in the top of beginning 3 chain. Don’t break the yarn and work the hanger as shown:
Carré soleil 3 - crochet 1
Carré soleil 3 - crochet 2
Carré soleil 3 - crochet 3
Carré soleil 3 - crochet 4
Carré soleil 3 - crochet 5
Carré soleil 3 - crochet 6
Carré soleil 3 - crochet 7
Carré soleil 3 - crochet 8
Break yarn and wave in ends.
Et voilà Sourire

Hope you’ll find this helpfull.
Happy crocheting
Bien à vous
Stefanina

jeudi 28 octobre 2010

Free grany hexagon and pouch tutorial : Pochette bleue

As I really love playing with my hook and a lot of colored yarn, and as I needed some pouch to put my circular knitting needles, I’ve just finished this little pouch and I’m happy to share with you.

Here is my little

 POCHETTE BLEUE (Blue pouch)


Pochette bleue - granny hexagon

Pochette bleue  open - granny hexagon


Finished size

8 cm / 3.15 inches hexagon

23 x 15 cm / 9 x 6 inches finished pouch

Yarn

clip_image006

DK 8ply (100% cotton; 120 m - (131 y) / 50 g skein)

color Blue (yarn A, B and C); 1 skein of each color.

Sample project completed with Napoli (100% merino, 105m - 115 y / 50 g skein) from Bernetta Wolle

Crochet hook

  • One Crochet hook size 4.00 mm / US G

Granny hexagon pochette bleue

Chart

Granny hexagon pochette bleue chart

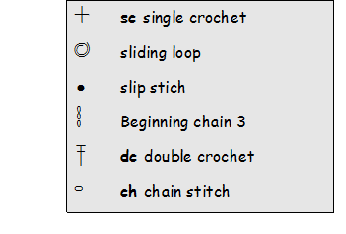
Legend

Granny hexagon pochette bleue legend

Written pattern

Begin with a sliding loop

Round 1 Ch 3, dc, ch1 *dc2tog, ch 1* repeat from * to * 5 times around, join with slip stitch in top of beg 3 ch.

Round 2 (ch 3, dc, 2dctog) in next ch space, ch 2 *(2dctog, 2dctog) in next ch space, ch 2* repeat from * to * 5 times join with slip stitch in top of 3 beg chain. (6 groups of stitches)

Round 3 (Ch 3, dc) in 1st ch space, ch 1, *(2dc, ch 1) 4 times in next ch 2 space, ch 1* repeat from * to * 4 times, (2dc, ch 1) 3 times in next ch 2 space, ch 1, join with slip stitch in top of 3 beg chain.

Round 4 Ch 1, sc in next dc, **3dc, in next ch space, *(sc in next dc) twice, sc in next ch space* repeat from * to * 3 times (sc in next dc) twice**, repeat from ** to ** 5 times, 3dc in next ch space, *(sc in next dc) twice, sc in next ch space* repeat from * to * 3 times, join with a slip stitch in top of beg ch.

Break yarn. With a sewing needle, weave in ends.

Granny hexagon close-up

Work 16 hexagons and join them on the wrong side with single crochet as shown on the picture.

Granny heaxagon flat

And then close the pouch, joining A to A and close the bottom B.

Et voilà!

Happy crocheting Sourire

This pattern has been carefully reviewed, but if there is any questions, comments or mistakes please contact me via comments on the bottom.

By Stefanina © October 2010

www.stefanina-knitting-design.com

This is a free pattern for your personal use.

Want to share ? Just please link to my blog, thank you for respecting my work.

Chart and Legend : credit font StitchingCrochet TM

mardi 26 octobre 2010

Sliding loop : an easy way to begin granny square!


The double sliding loop is my favorite way to begin a granny square. I find this method fabulous as I can make the beginning ring the size I want.

I worked it with a double ring as I find it more safe and easier to weave in end the tails. And here is a tutorial just to share with you my way to work :

1. Wrap your yarn 3 times around your finger

Sliding loop 1

2. Insert  hook into 3 rings

Sliding loop 2

3. Pull the working end of yarn through the rings

Sliding loop 3

Sliding loop 4

4. Work a yarn over with the working end of yarn

Sliding loop 5

6.And pull it through the loop on the hook

Sliding loop 6

Sliding loop 7

Sliding loop 8

8. Work the first round as indicated in the pattern and at the end of round pull the first tail to close the ring

Sliding loop close 1

9.Then pull the second tail to close the ring

Sliding loop close 2

10. Finally close your round with a slip stitch as indicated in your pattern

Sliding loop close 3

Hope you find this helpful Sourire

Happy crocheting

Bien à vous

Stefanina

lundi 25 octobre 2010

Carré soleil Crocheted granny square


Just for the pleasure to share with you, here is my new play with crocheted granny square:
Carré soleil granny square


Finished size
8 cm / 3.15 inches square
Yarn
clip_image004
Worsted 10 ply (100% cotton; 105 m - (115 y) / 50 g skein)
color yellow 1 skein
Sample project completed with Sprint (100% cotton, 105 m - 115 y / 50 g skein) from Bernetta Wolle
Crochet hook
  • One Crochet hook size 3.5 mm / US E

Chart
Carré soleil granny square chart
Legend
clip_image002
Written pattern
Begin with a sliding loop
Round 1 Ch 1, *sc, ch* repeat from * to * 8 times around, join with slip stitch in 1st sc.
Carré soleil rnd 1
Carré soleil rnd 1 join
Round 2 (ch 4, dc) in next ch space, *(dc, ch 1, dc) in next ch space* repeat from * to * 7 times join with slip stitch in top of 3 beg chain. (8 groups of stitches)
Carré soleil rnd 2
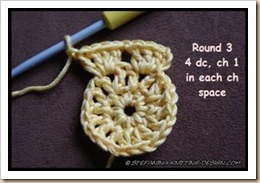
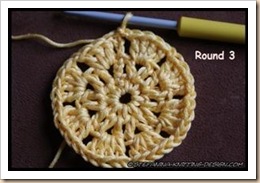
Round 3 Ch 3, 3 dc in 1st ch space, ch 1, *4 dc in next ch space, ch 1* repeat from * to * 7 times, join with slip stitch in top of 3 beg chain.
Carré soleil rnd 3
Carré soleil rnd 3 join
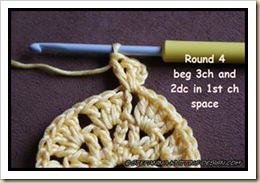
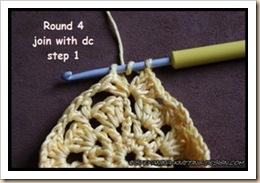
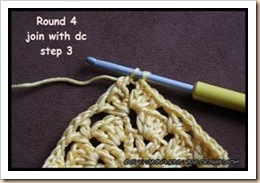
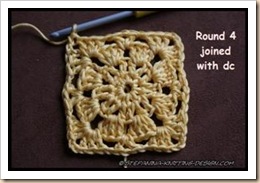
Round 4 Ch 3, 2dc, in 1st ch space (Corner), ch 1, *(dc, ch 1, dc) in next ch space, ch 1, (3 dc, ch 2, 3 dc) in next ch space (Corner), ch 1* repeat from * to * 3 times, (dc, ch 1, dc) in next ch space, ch 1, 3 dc in next ch space, join with a dc in in top of 3 beg chain.
Carré soleil rnd 4
Carré soleil rnd 4 beg
Carré soleil rnd 4 join
Carré soleil rnd 4 join 2


Carré soleil rnd 4 join 3
Carré soleil rnd 4 join 4


Round 5 Ch 3, 2dc, in 1st ch space (Corner), ch 1, *  **(dc, ch 1, dc) in next ch space, ch 1** repeat from ** to ** 2 times, (3 dc, ch 2, 3 dc) in next ch space (Corner), ch 1* repeat from * to * 3 times, (dc, ch 1, dc) in next ch space, ch 1, 3 dc in next ch space, join with a dc in in top of 3 beg chain.
Break yarn. With a sewing needle, weave in ends.
You can work as many round as you desire by adding on each round one more repeat from ** to ** (for round 6 repeat 3 times, for round 7 : 4 times ….)

For this second square  carré soleil, I have worked 12 rounds and finished with a shell border.
clip_image032
Et voilà!
Happy crocheting
Bien à vous
Stefanina

This pattern has been carefully reviewed, but if there is any questions, comments or mistakes please contact me via comments on the bottom.

By Stefanina © October 2010
http://www.stefanina-knitting-design.com/

This is a free pattern for your personal use.
Want to share ? Just please link to my blog, thank you for respecting my work.

Chart and Legend : credit font StitchingCrochet TM